| ASA DDM60 mount - page 3 |
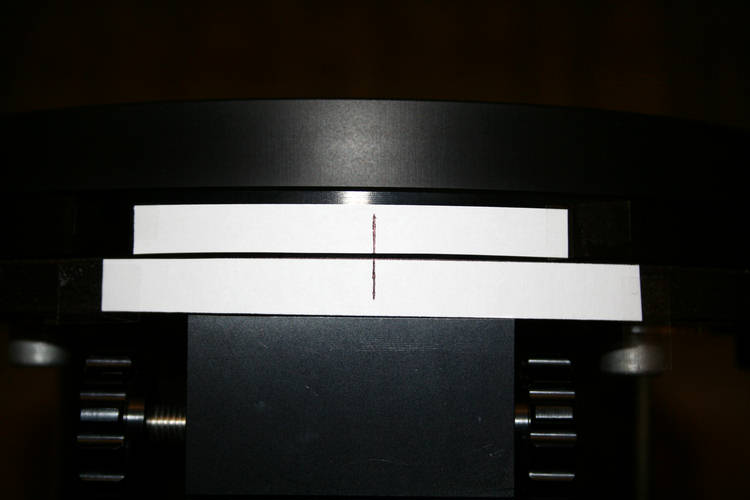
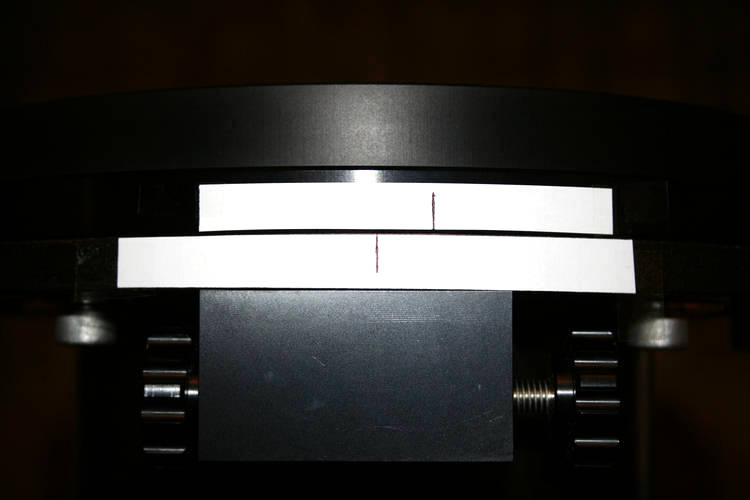
| Measuring the
adapter plate rotation angle. Paper strips taped to the plate and pier. Right hand knob fully rotated. |
 |
|
| Left hand knob
fully rotated. (The adapter plate rotates very smoothly and evenly.) The top line has shifted 11.5mm, which equates to an angular shift of 4.7 degrees. Laser alignment should get to within a degree of the pole so this is ample. |
 |
|
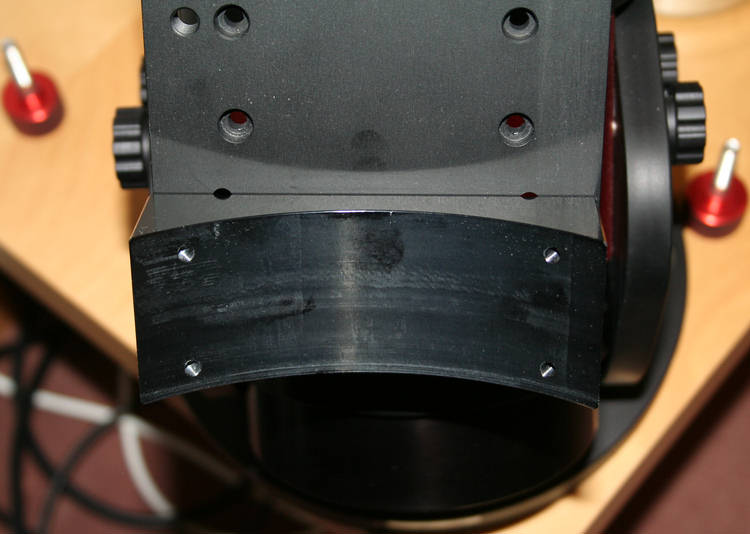
| Rob
Januszewski of Epsilon
Telescopes also made some blocks to allow my tube rings to be attached to
the saddle plate. |
 |
|
| One of the blocks
in position on the saddle plate. |
 |
|
| The 6" telescope,
mount and pier assembled. Next task is to balance the scope and become more familiar with the Autoslew software before installing in the observatory. |
 |
|
| 14th March 2010 The mount is now in the observatory! Polar alignment poses a problem in that the green laser was too cold. A few minutes with a hair dryer got it working and rough polar alignment was done. (I later found that there is a heater built into the mount which operates if you hold the laser button down...) Because I have an azimuth adjustment on the pier I decided to do an initial polar alignment using the old fashioned drift method. (I have no finder scope on the 6" reflector at the moment which makes the ASA method difficult). I pointed the scope close to the equator and the meridian and took two images with the Canon 350D. Stars had drifted North so that meant rotating the azimuth clockwise. After several adjustments there was very little drift North/South. Clouds then came over so adjustment in altitude will have to wait. |
||
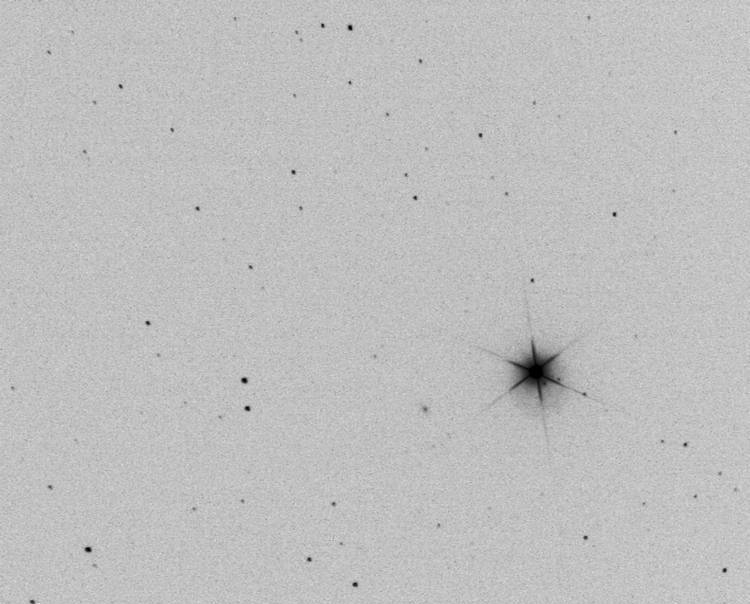
| A crop of the
final image. The star is 31 Leo and the exposure was 210
seconds. This is already a lot better tracking than I could ever get with the EQ6! Stars showed some elongation, possibly due to camera tilt and collimation. |
 |
|
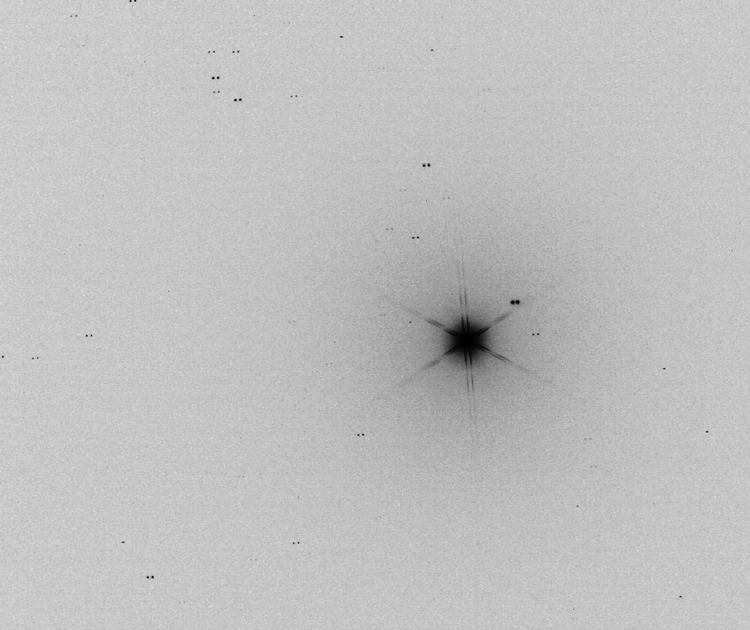
| 21st March
2010 Collimation improved and the focuser adjusted to bring the camera CCD perpendicular to the optical axis. Images across the field are now pinpoint. This shows the drift in 30 minutes around Regulus. Almost zero drift in DEC which shows azimuth alignment is very good. |
 |
|
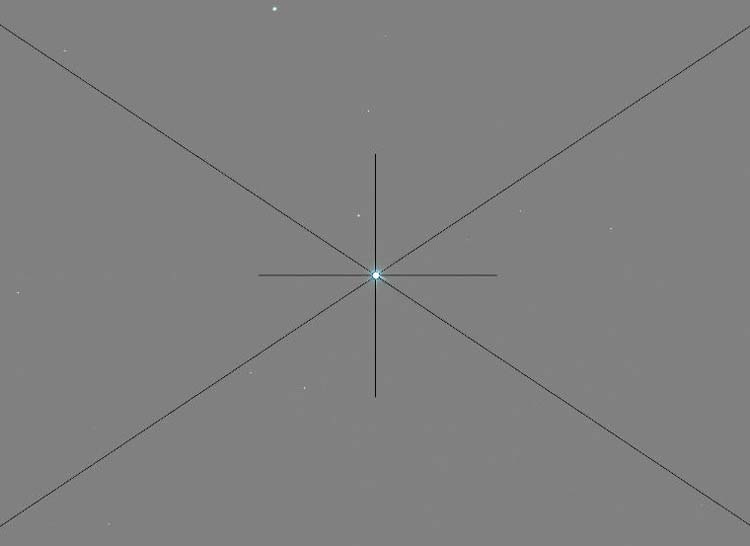
| 22nd
March Polar alignment using a pointing file. There is a handy free program called Merge which allows two images to be easily superimposed. I constructed a grid as one image. It is then quite easy to guide a star to the centre of the grid with the joystick control allowing a precise position to be set. Because I use a DSLR without live view a separate image has to be taken between each adjustment, but after some practice I could centre a star after about 5 or 6 images. I preferred this method to a reticle eyepiece because in some positions in the sky the eyepiece is only accessible with a stepladder. |
 |
|
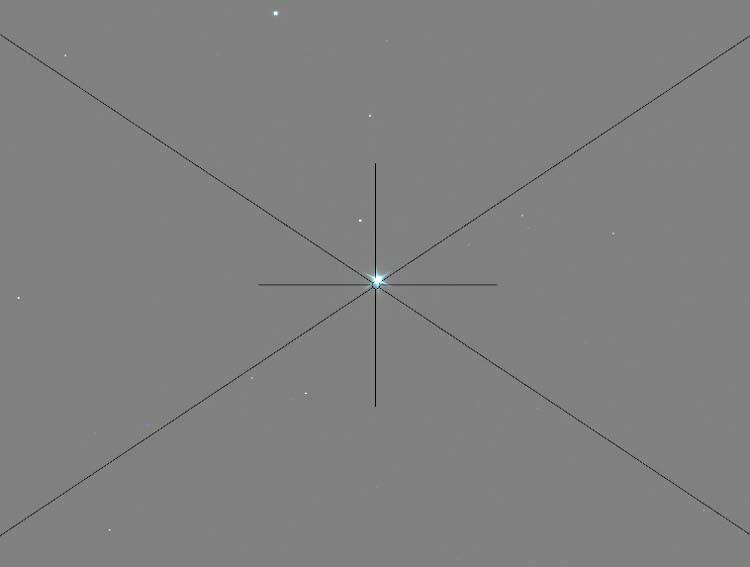
| To polar align
you have to slew to a succession of stars. Each star is then centred
accurately. After 6 or 7 stars Autoslew calculates how far off polar alignment
you are. You then centre another star and Autoslew will offset it by the exact
amount of your misalignment. If the star is returned to the centre by adjusting
altitude and azimuth then in theory you have excellent polar
alignment. This image shows how much Autoslew offset the final star. Next page |
 |
|