| Light Box and Flat Frames |
| Most
of my images suffer from some degree of
vignetting. The example below shows the typical darkening
towards the edges of the frame. The way to get rid of this effect is to use
'flat frames', and a good way to make flat frames is to use a
'lightbox'. |
|||
 |
|||
| A
perfect light box provides a uniform 'flat' white light, without any intensity
gradients. This is photographed, and the resulting image then contains the
gradients caused by the optical system. During processing the 'flat frame' is
used to correct the image. This is the inner part of the box. Eight white LEDs are arranged to cast light upwards into the box. The light will be reflected off several white surfaces before coming downwards onto an opal white perpex screen which will be placed under the central hole. The four vertical polystyrene panels ensure that the light has to take a circuitous path and does not shine directly onto the perspex screen . This will avoid producing eight 'hotspots' around the circumference of the screen. |
|||
 |
|||
| Below
is the completed lightbox. The Telescope is aimed at the centre of the opal
screen and an image is taken. The exposure duration should be enough to get an
image intensity of 30-50% of saturation. The easiest way can be to point the telescope vertically and place the light box on top. I am not sure there is sufficient clearance in my observatory to do this! |
|||
| The lightbox switched on. Measurements with Photoshop show that the circle of light is slightly brighter in the centre. If this turns out to be a problem it should be possible to place something that absorbs a little light at the back of the box. | |||
 |
|||
This is a 160th second image of the lightbox screen converted to greyscale and contrast enhanced. The central brightening is clearly seen, but it is uncertain how much of this is actually due to the camera. The smudge at 1 o'clock is probably dust on the camera sensor. (These dust artifacts will also be removed from the final image during processing). |
|||
 |
|||
| I
printed a 200mm black 'star' on A4 paper and pinned it to the inside of the
lightbox opposite the centre of the opal screen. A contrast enhanced image is
below. The centre of the lightbox screen has darkened and there is a noticeably flatter light intensity across the screen. |
 |
||
 |
The
screen is 330mm across and my large scope has a 254mm diameter mirror. The
lightbox produces quite a uniform intensity over the central area. The bright
hotspot in the centre has gone. |
||
 |
This
is a plot of intensities as shown by Photoshop. |
||
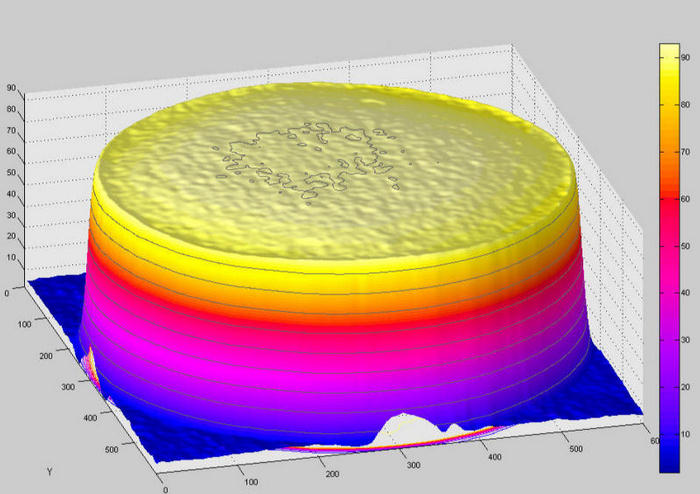
| A contour map of the light
intensity across the lightbox. The surface looks a bit 'lumpy', but vignetting and dust in the camera will contribute to the end result. The 10" telescope has a smaller diameter aperture than the lightbox screen and only the central part of the lightbox screen is used. |
 |
|
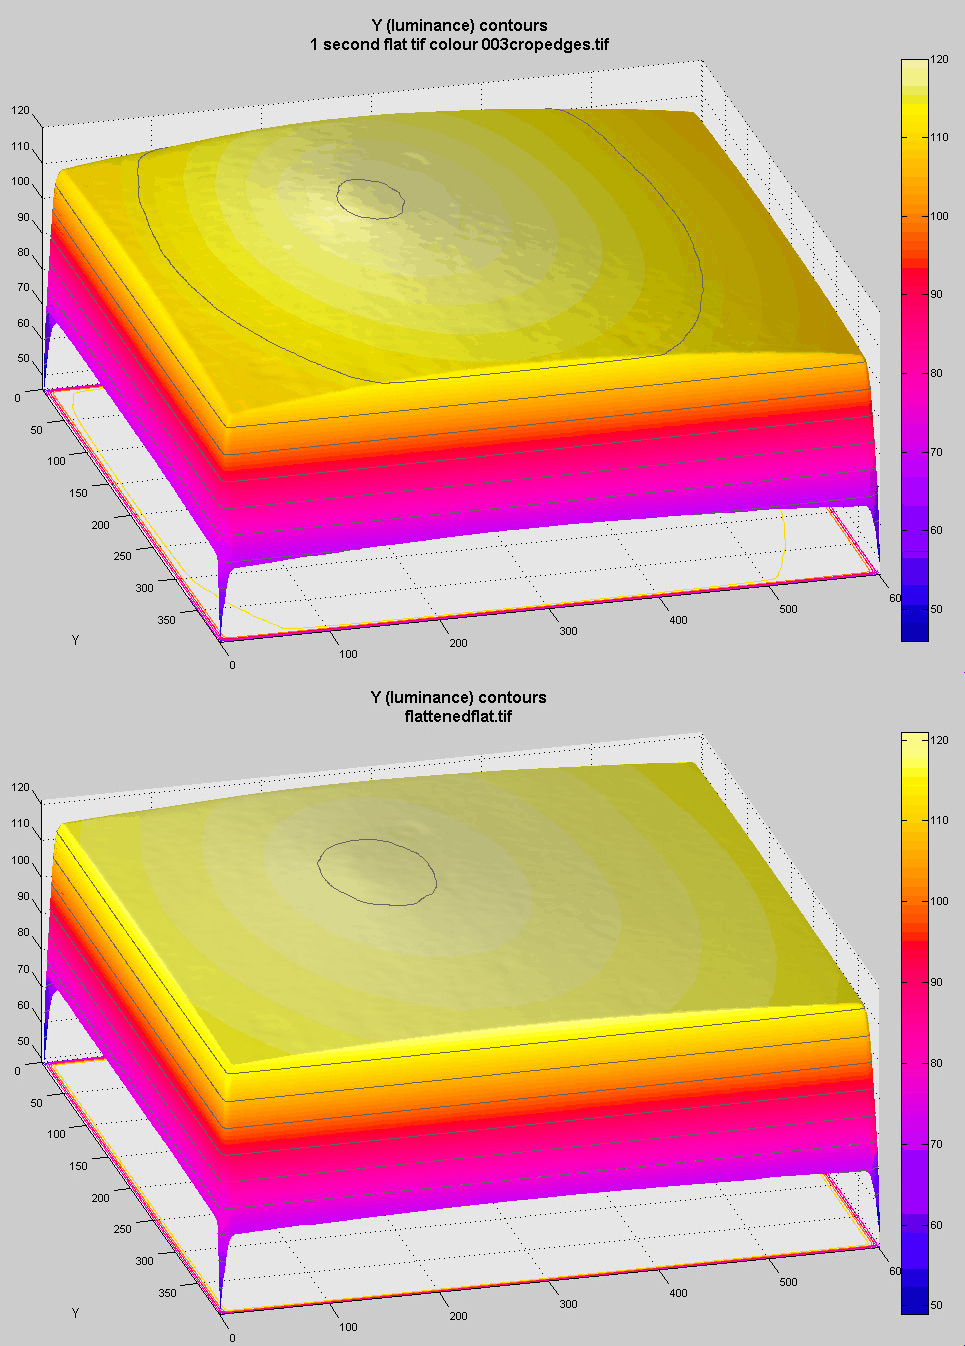
A flat frame taken with the 10" reflector. (1 second exposure). Using this flat frame gave over-corrected results - the edges of images were now too bright. After trying a variety of different exposures, I decided to tinker with the flat frame in Photoshop. |
 |
|
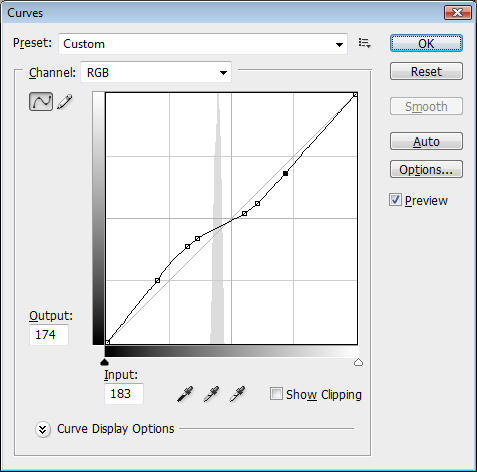
| Adjusting the
'curves' line like this boosted the darker areas and lowered the brighter
areas. This, in effect, 'flattens the flat'. Trial and error is needed to see how much correction is needed. I had to do the procedure four times before I got the results I wanted. |
 |
|
|
This animation shows the flat before and after the curves treatment. |
||
 |
||
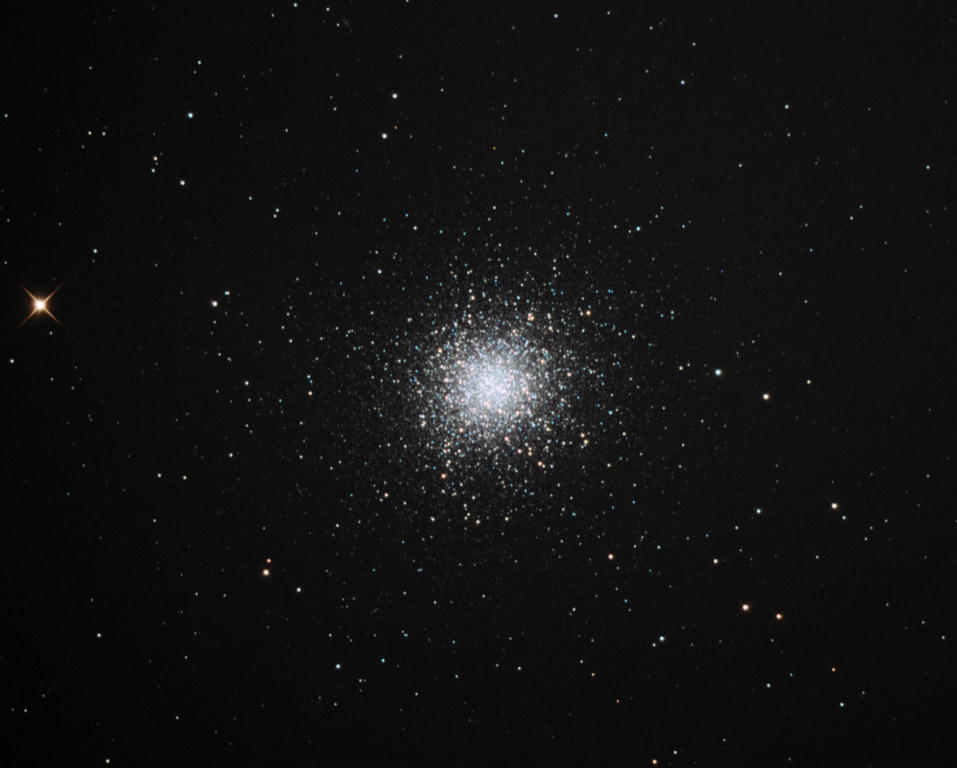
The end result. The background in this image of M13 is the same intensity over the whole frame. |
||
 |
||
Boxcar filter |
My first attempts at using flat frames with the SXVF-M25C camera were failures. This is because I did not appreciate that I should not have used colour flat frames. The SXVF-M25C is a 'one-shot colour' camera. Normal procedure is to convert the raw Bayer encoded mono images to colour, but this should not be done with the flat frames. | |
| How this is done
with Maxim DL |
||
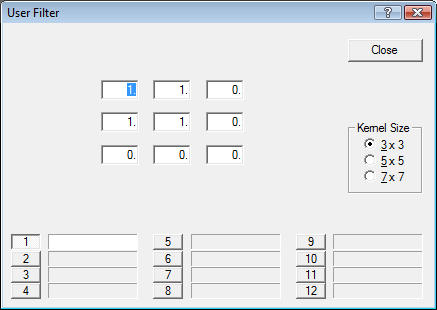
| Load the raw flat frame into Maxim and open the Filter menu. Choose User Filter and then Set |  |
|
| Set the four top
left cells to 1. Apply the filter and the image will be converted to mono. |
 |
|