Mosaic Tutorial
One of the most difficult tasks for the astrophotographer is the construction of a mosaic of images.The separate images tend to have different brightness levels due to varying sky conditions,
and distortions in the images make it impossible to align stars perfectly in adjacent panes.
Over the years I have tried various methods, but only recently have I settled on a method that
is both easy and accurate.
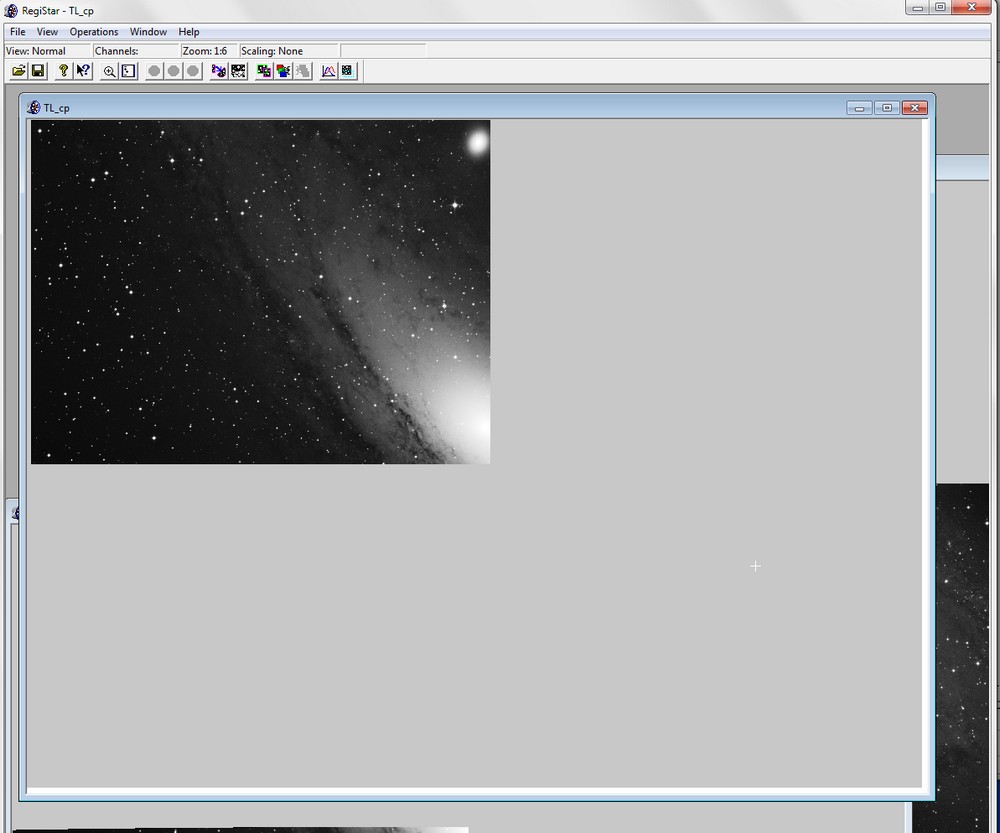
An exercise with M31 serves as a useful example to illustrate my method.
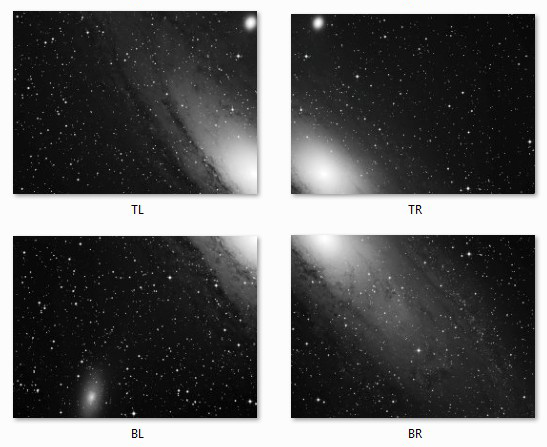
The four images have been named to describe position, ie, BL = bottom left and so on.
The images are TIF files and the brightness levels have been adjusted to appear the same.
Aligning the stars
The program Registar by Auriga Imaging works very well. It will identify all the stars in the images,
work out where the overlaps occur, and then distort the images so that the stars are accurately registered.
Registar operation is well described in this tutorial by AstroMatt, but I will outline a few steps.
- Put all the images to be aligned in one folder. (No other images in the folder - Registar looks for images by itself)
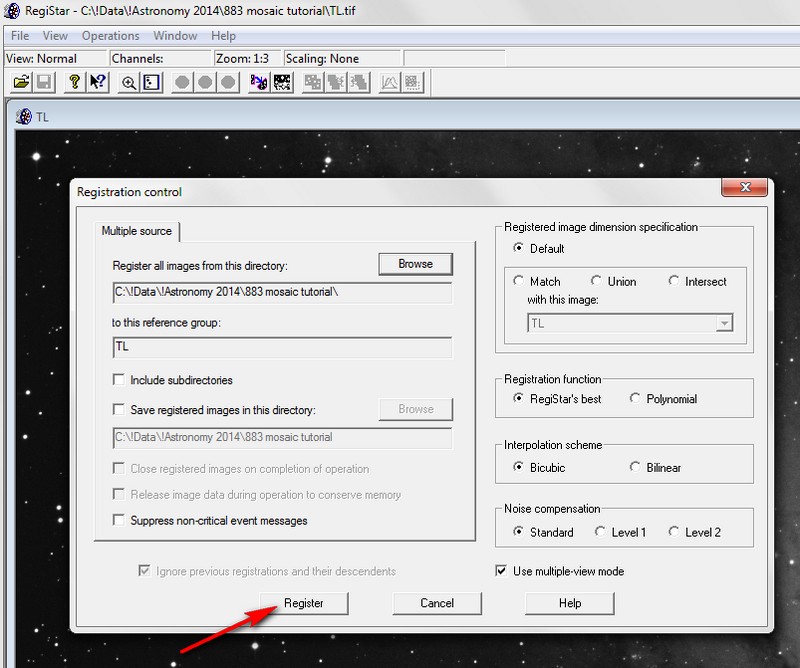
- Load one image into Registar, as the reference image (I used TL, Top Left)
- Operations menu - Register. Use default settings.
You will end up with a screenful of bewildering complexity but do not panic.

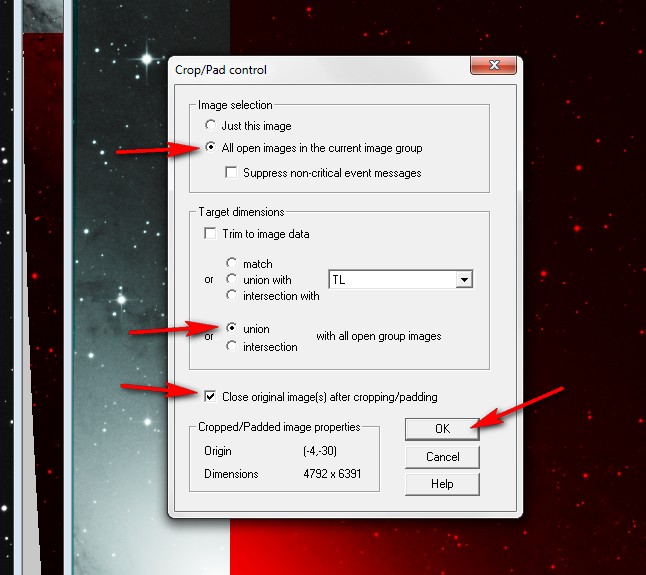
Then follow Operations - Crop/Pad Image.
Use these settings.
Lots will happen on screen, but eventually the multicoloured windows will disappear, leaving only the registered images.
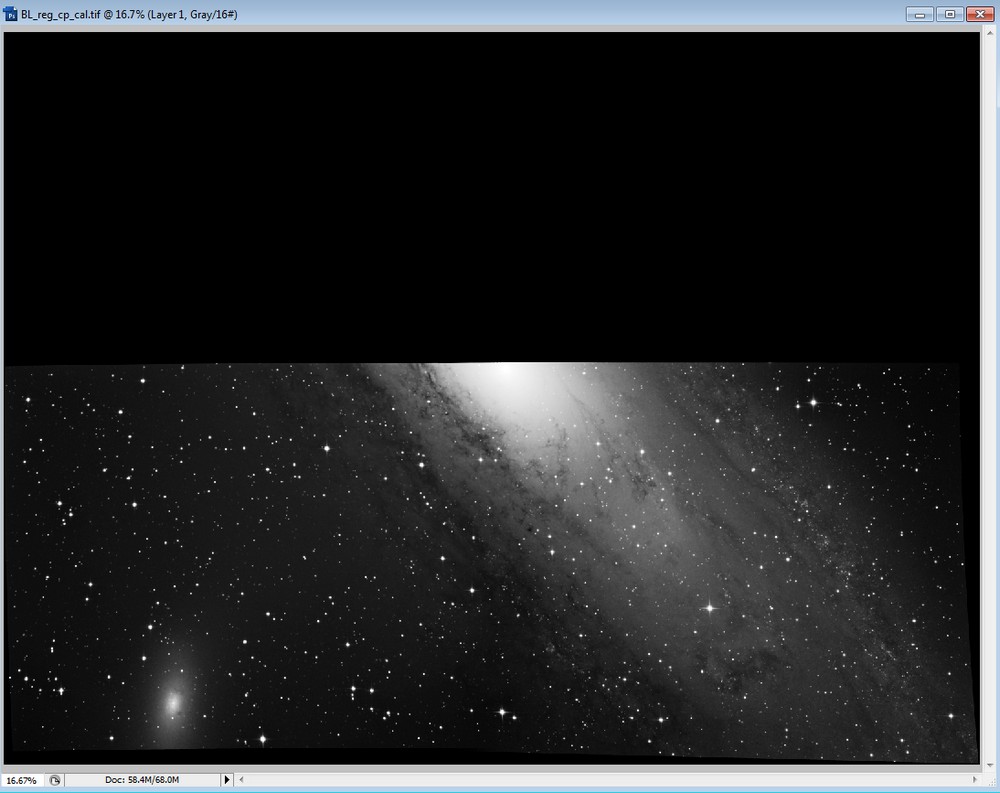
Each image is 'padded'. Registar has created a large blank area around each image so that all the panes are
the same size, and if they are overlaid, the stars in all panes will align perfectly.
If you think the brightness levels in your images are not well matched, you can use the Operations - Calibrate feature in Registar.
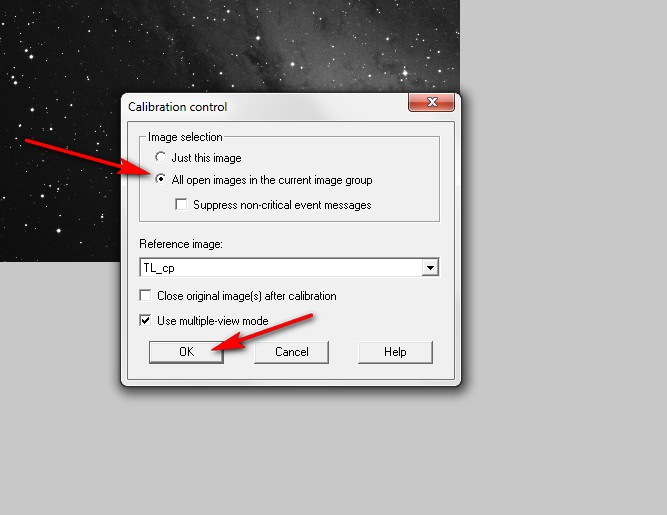
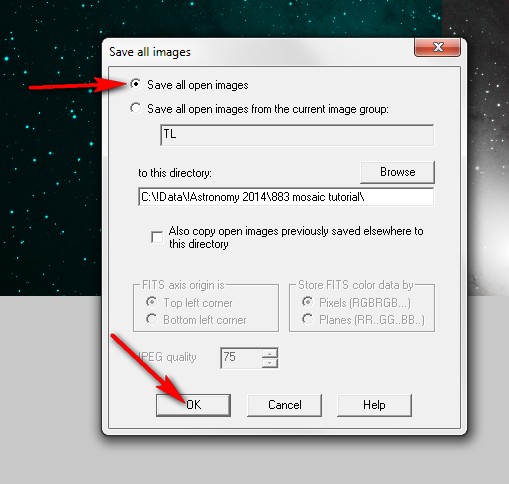
This will generate a new set of confusing windows. Ignore them and follow File - Save All.
Registar can now be closed. (Registar can be coaxed into combining the panes, but I find that
the joins are very obtrusive. It is far better to do all the assembling in Photoshop).
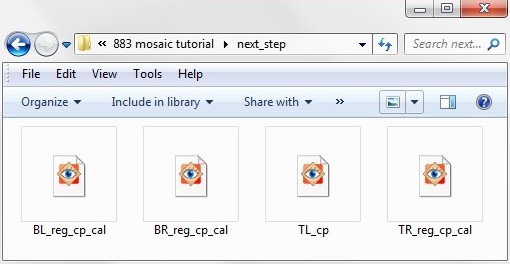
If you have saved the images in the same folder as your originals, you will have this:
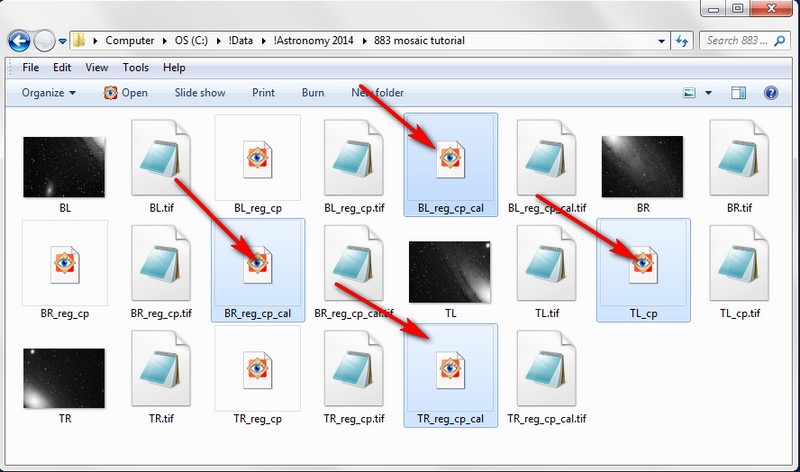
The images you want to work with now are arrowed. Notice that the image you chose at the beginning has _cp added to it,
This was your reference image. The others have _reg_cp_cal appended, showing that they are registered and calibrated.
It is best to transfer these images into a separate folder.
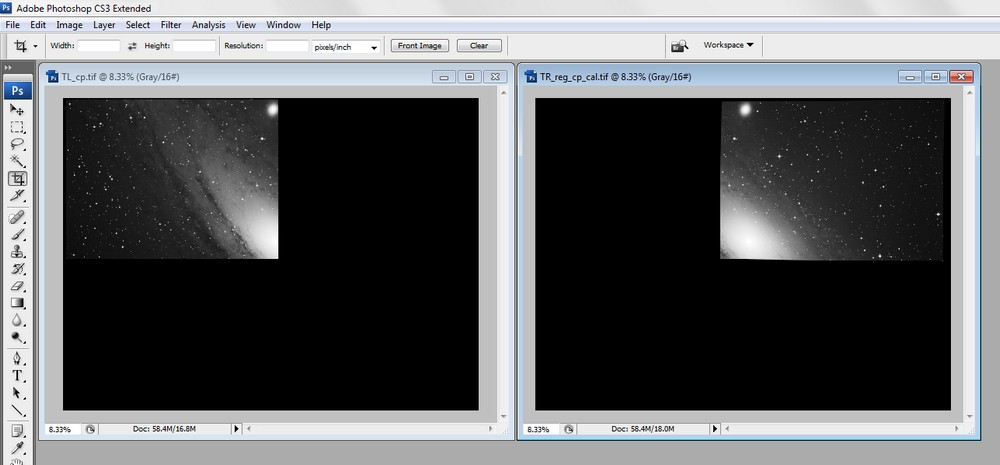
Combining in Photoshop
The next step is to combine the two top images, TL_cp and TR_reg_cp_cal in Photoshop.
(Note: I use Photoshop CS3 extended)
Now select the Move Tool and click on the right-hand image TR_reg_cp_cal
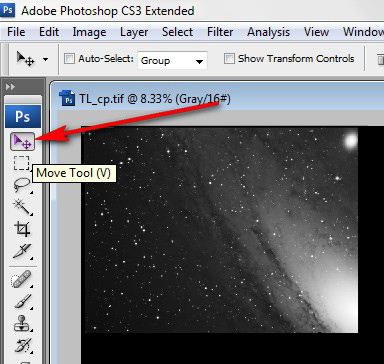
Copy (CTRL-C) and Paste (CTRL-V) the right hand image onto the left hand (reference) image.
The left hand image is not visible, but it is underneath the right hand image, which is now in a new 'Layer'.
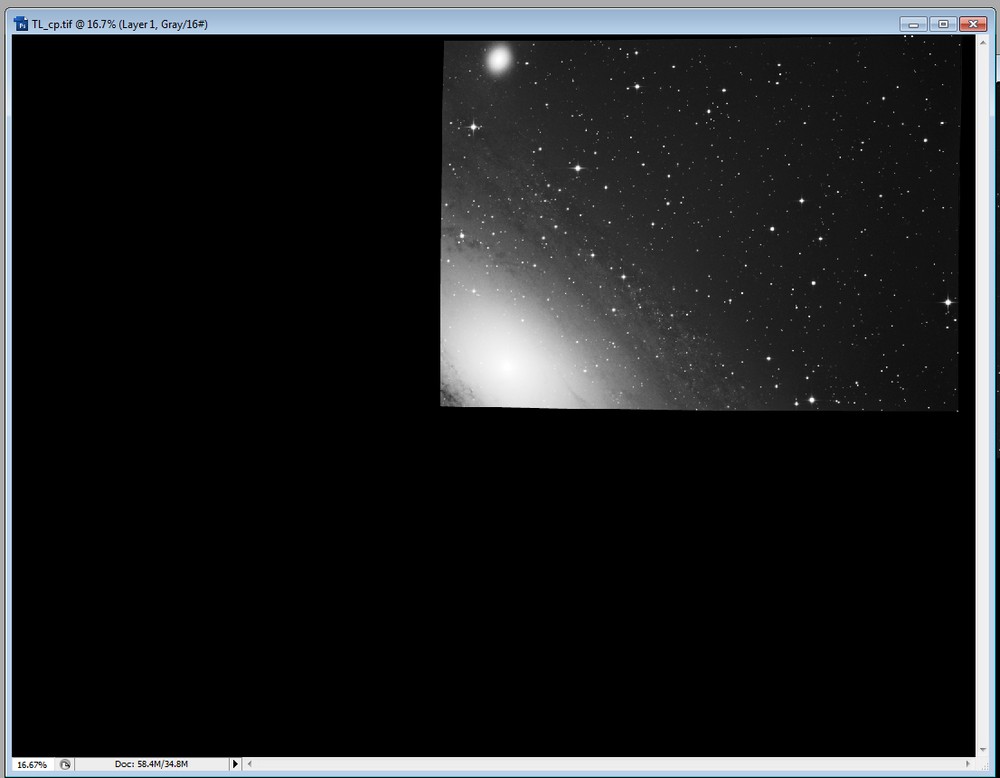
Set the opacity of the layer to about 50% and both layers will be visible.
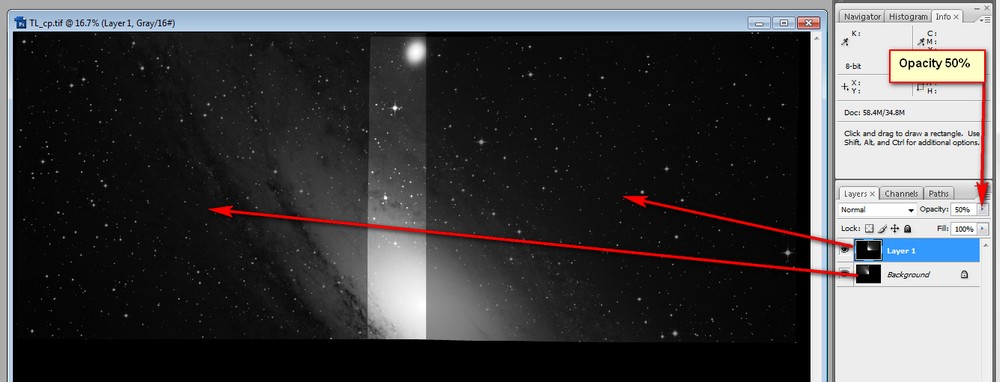
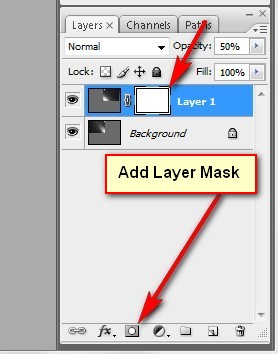
Make sure that Layer 1 is highlighted in blue, and create a 'layer mask' by clicking on the Add Layer Mask icon
at the bottom of the layers menu. The layer mask will show as a white rectangle.
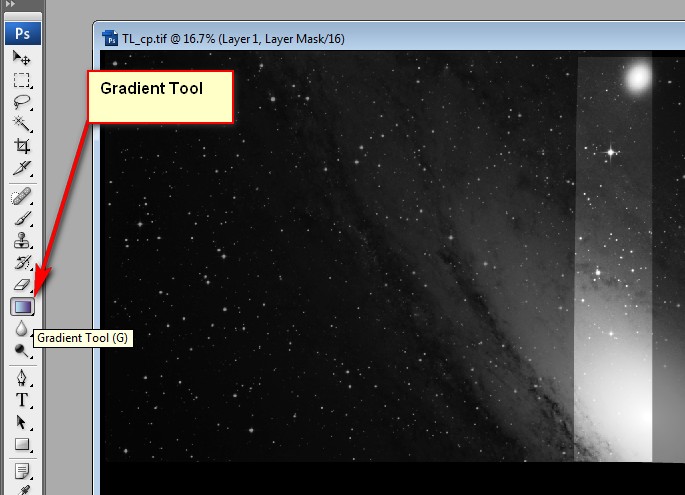
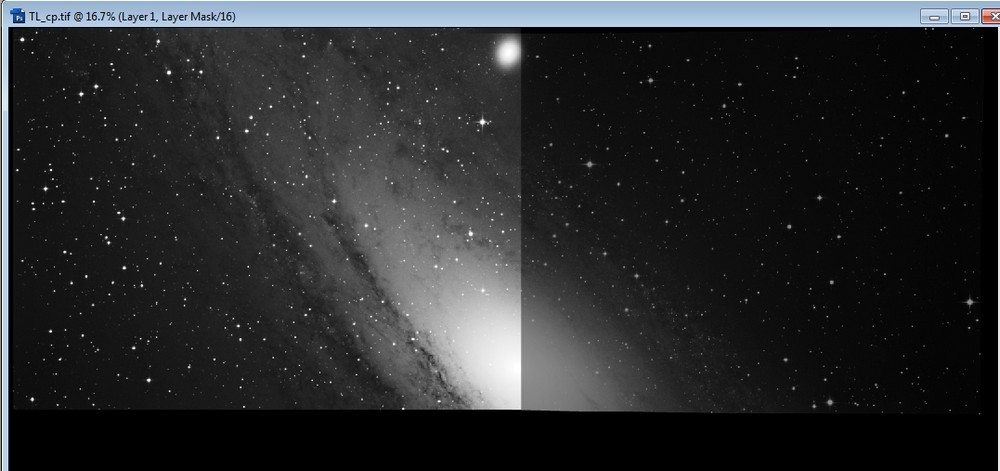
Now select the 'Gradient' tool
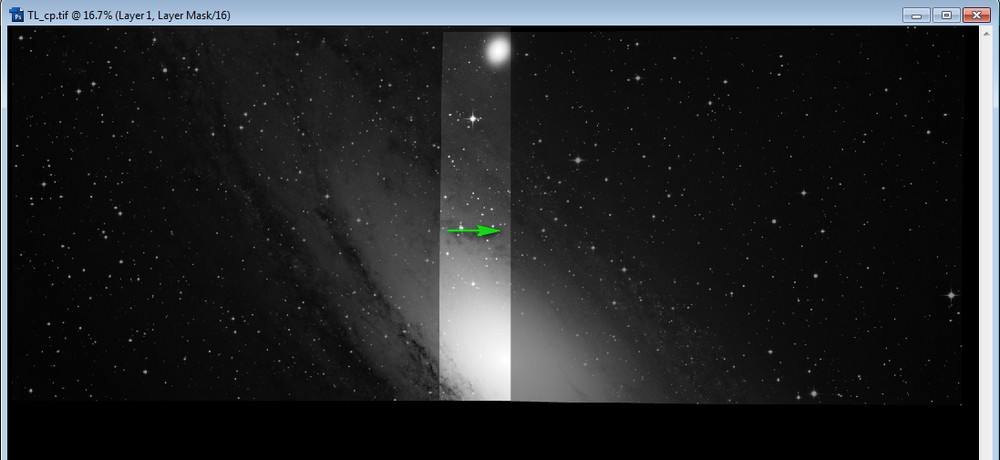
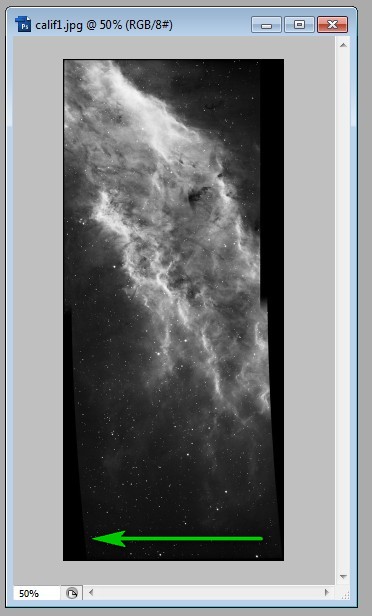
With the gradient tool, drag a small line across the region of overlap as shown by the green arrow below.
Take care not to go over the edges of the overlap, and note that the overlap area may not have vertical edges.
Take the thinnest part of the overlap as a reference.
Things that can go wrong at this point: You might be dragging the gradient in the wrong direction.
If an entire pane disappears, just press CTRL-Z to undo what you have done and try reversing the gradient direction.
(If you don't like shortcuts, undo using the Edit menu).
If your gradient is in the right direction the background layer will now show up at 100%.
Change the Opacity of the right hand layer to 100%. Hey Presto! A very good merge should be the result.

If there is still a mismatch in brightness or contrast, the two layers can be adjusted using Levels or Curves,
and any changes can be viewed directly. It should be possible to get a totally invisible join.
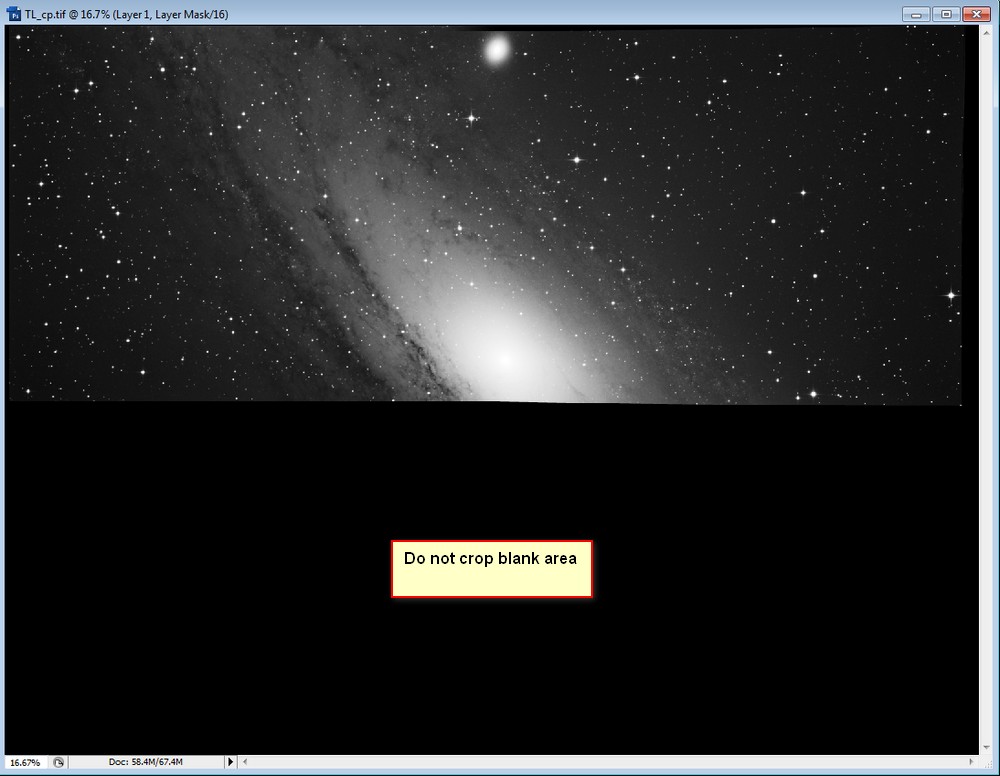
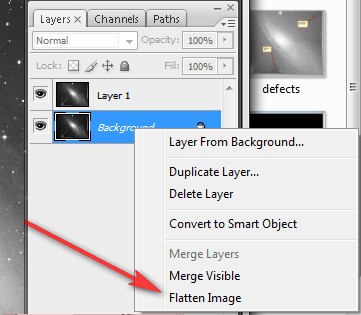
When you are happy with the result, right click on the background layer in the Layers menu and select 'Flatten Image'.

Now save this image under a new name, eg 'Top-Half'.
Note that the bottom blank area is still there - do not attempt to crop it out!
Now repeat these steps for the two lower panes, BL and BR.
You will end up with:
The merge technique is now repeated with the two images 'Top_Half' and 'Bottom Half'
to make a final image 'Both_Halves'.
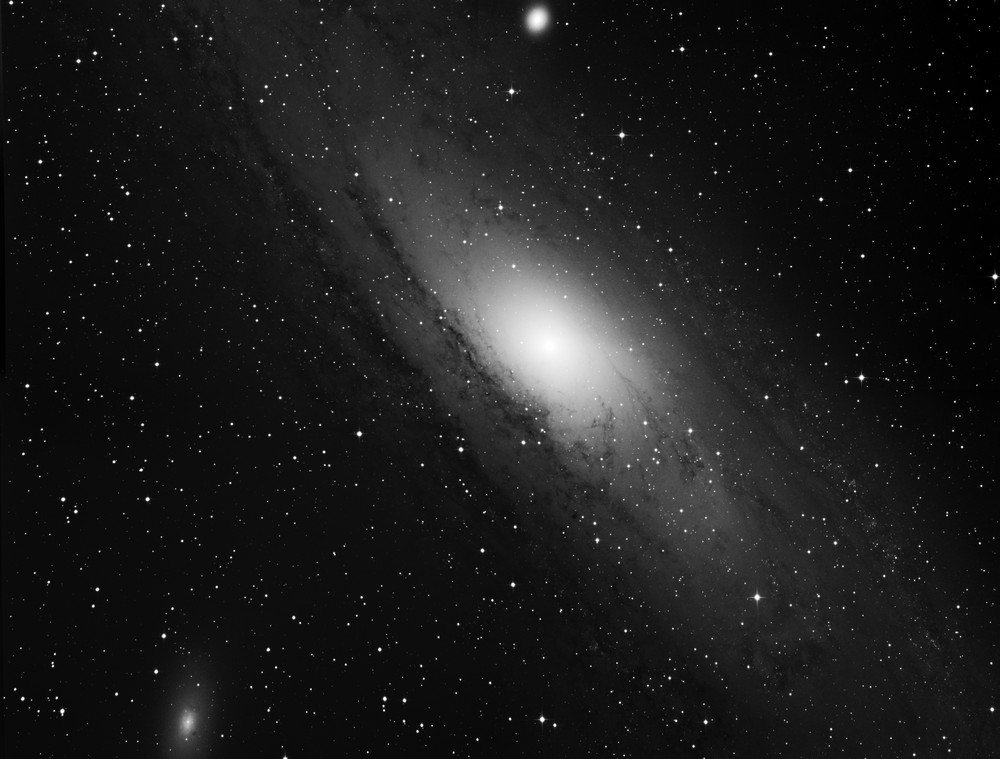
When the jagged outer edges are cropped you have:
Finishing touches
Despite your best efforts, there may still be areas of the mosaic that have problems.
Perhaps there was a Moon in the sky for one of the panes, and the brightness is not
well matched between adjacent frames.
Remnants of vignetting that have not been completely
eliminated with flat frames can cause unwanted dark areas.
Problem areas can be revealed by using Levels in Photoshop.
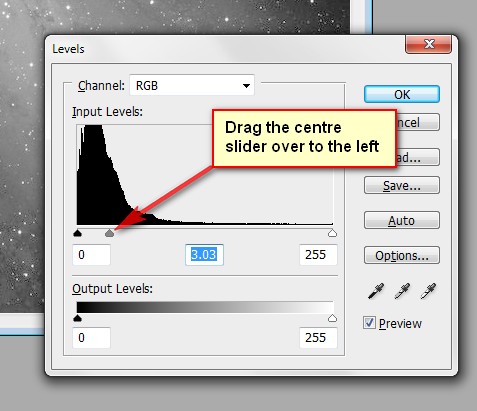
Defects that were invisible before now show up. Two examples are arrowed below.
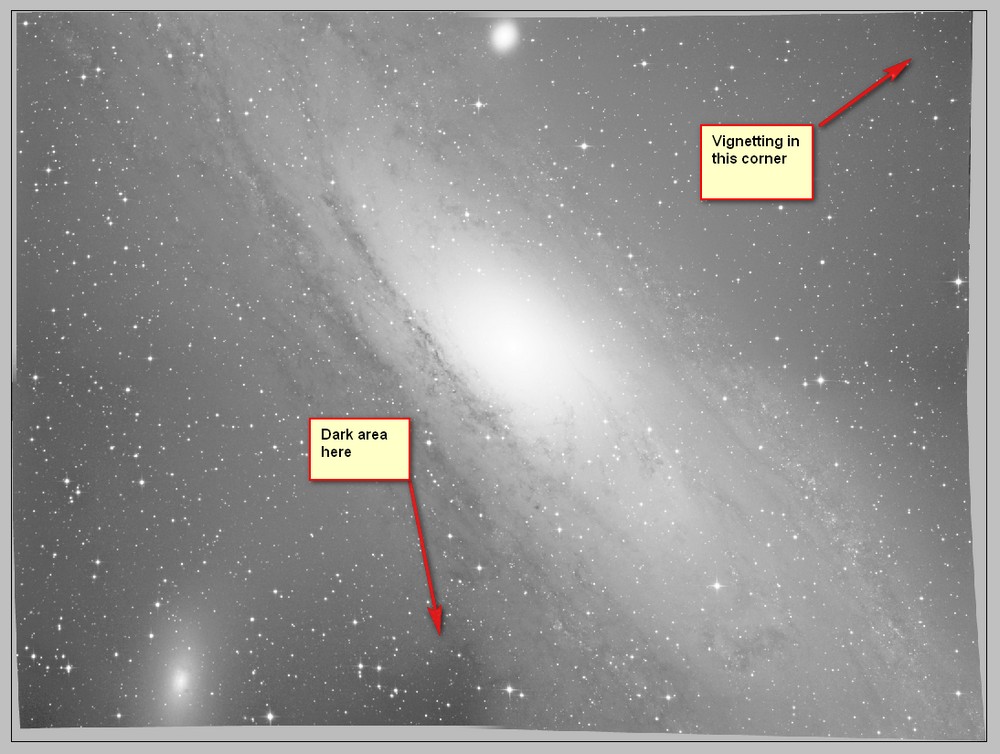
NB It is best to correct these defects BEFORE cropping the image. If you have cropped the image
then the separate panes will no longer be correctly registered, and you may need to overlay them on
your final image during the correction phase.
The two blemishes highlighted above could be removed using this technique:
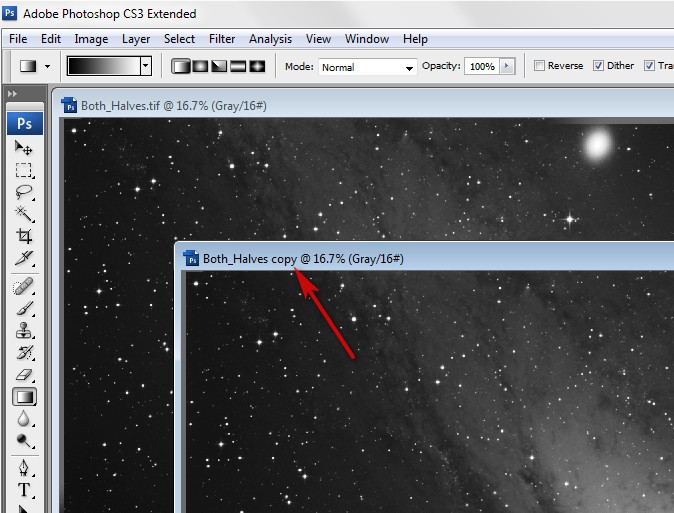
Make a copy of your image.
If you want to remove areas that are too dark then raise the brightness of the COPY using levels or curves.
(Only a small level rise - it is easy to overdo this step).
Then copy and paste the 'bright' copy over the 'dark' original.
(CTRL-C and CTRL_V are useful shortcuts for Copy and Paste).
The bright image now forms a Layer over the dark image, and the dark image is not visible.
Create a hidden Layer Mask by following Layer... Layer Mask... Hide All
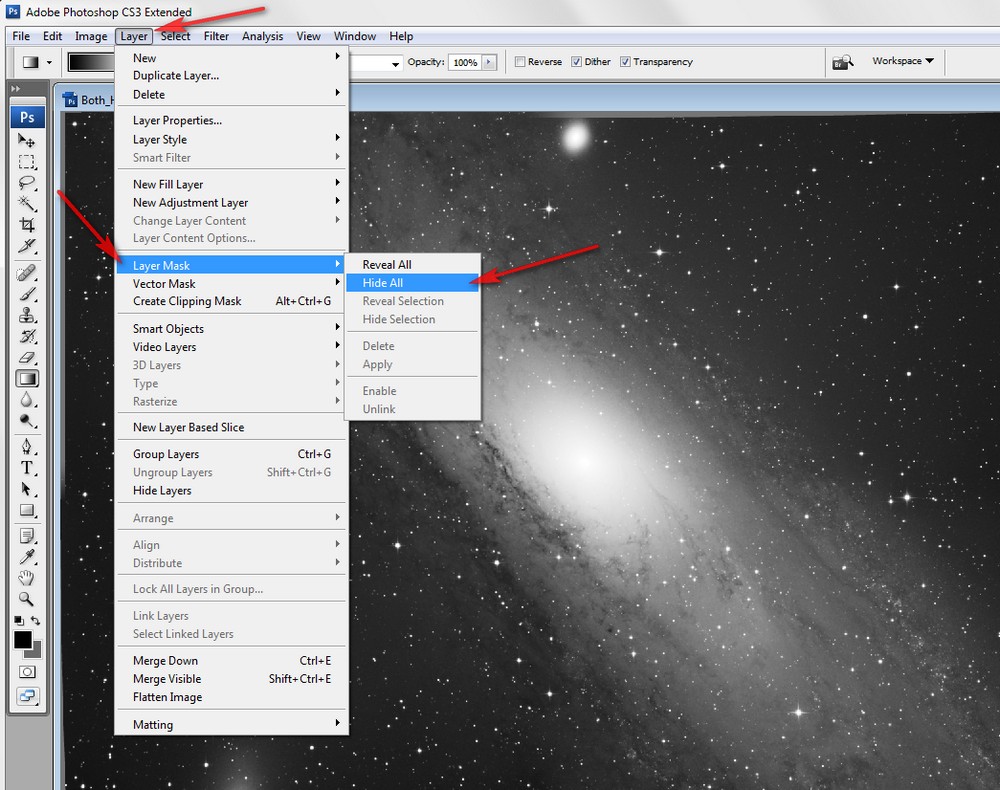
The bright image now disappears.
Now select the Brush tool and configure it as shown:
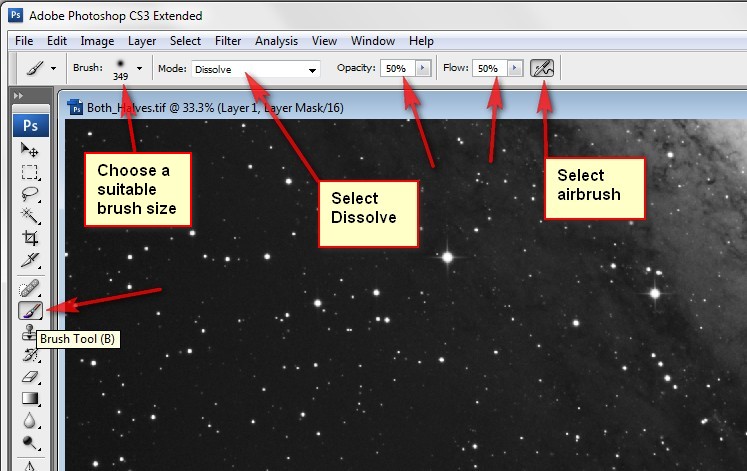
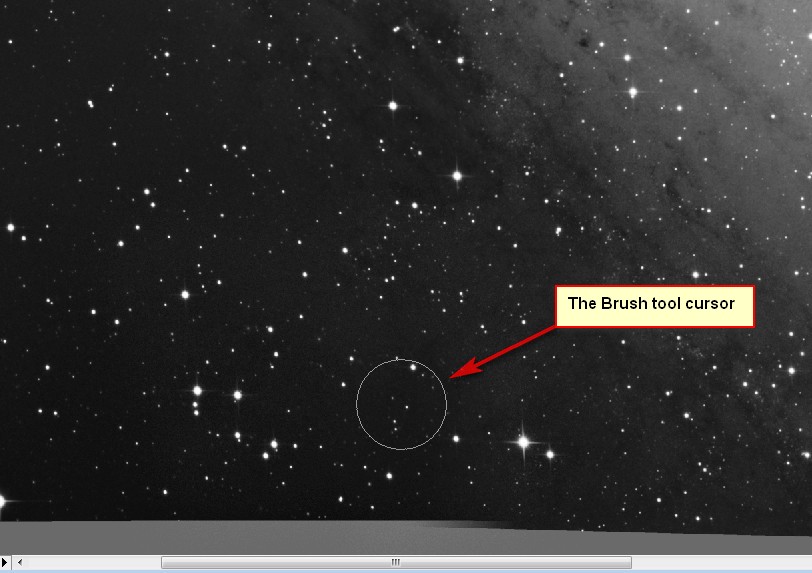
Carefully 'Paint' over the area to be lightened. The underlying layer will be revealed.
If you overdo it, press CTRL-Z to undo.
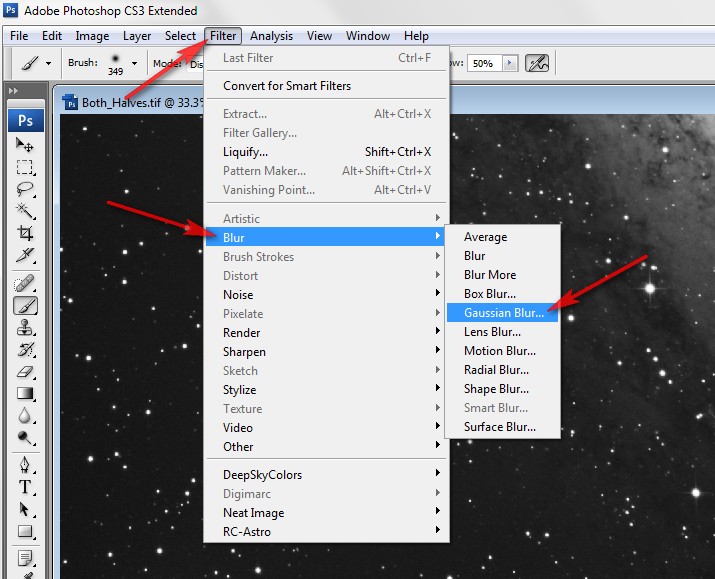
When satisfied, blend the edges of what you have done by following Filter... Blur... Gaussian Blur
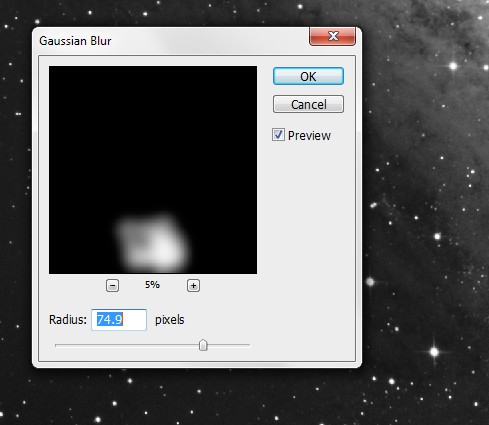
Set the Radius to a value that will give a smooth blend. Adjust the + and - buttons to locate the area of the blur.
It is usually hidden when you start.
Repeat this process for every area that needs lightening, and when finished flatten the image.
You should now have a very good mosaic, with undetectable joins, and a smooth background.
Clear Skies!
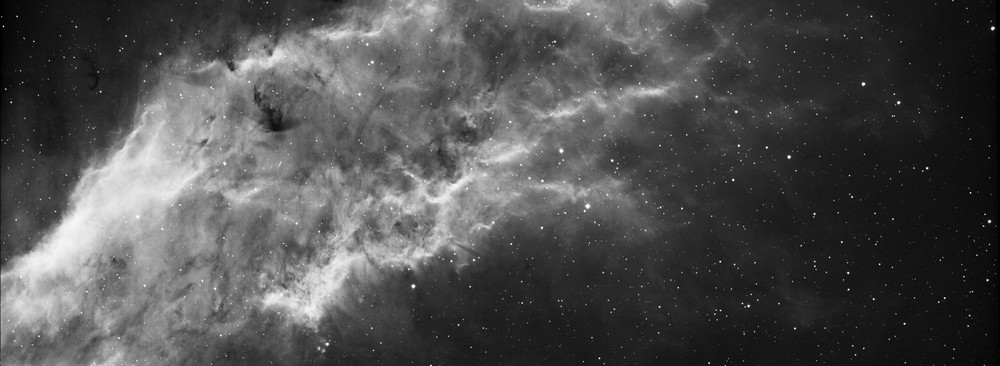
Correcting Distortion
Sometimes when you register two images in Registar, you end up with one image being
rather distorted. This happened with the California Nebula:
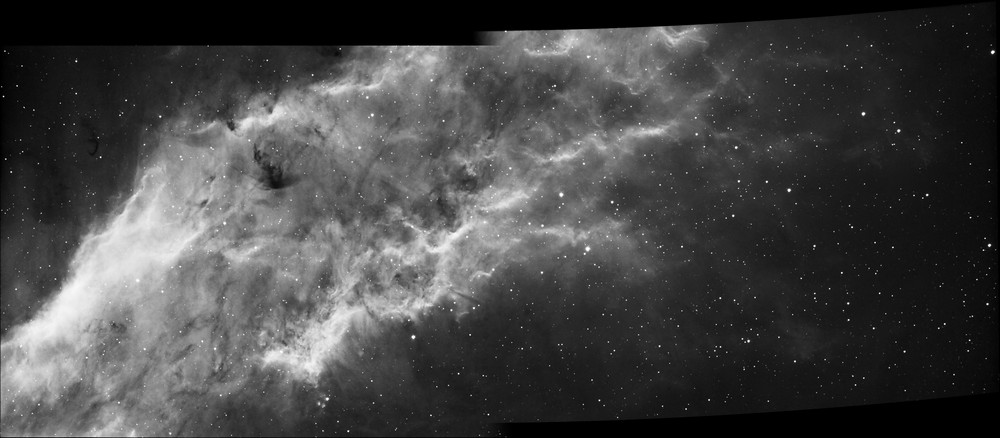
This can be corrected in Photoshop using the 'Shear' filter.
Step 1 - Load the image into Photoshop and convert to 8 bit (Image... Mode... 8 bits/channel)
All versions of Photoshop I have tried will not Shear 16 bit images.
Step 2 - Rotate the image so that the shear direction is horizontal
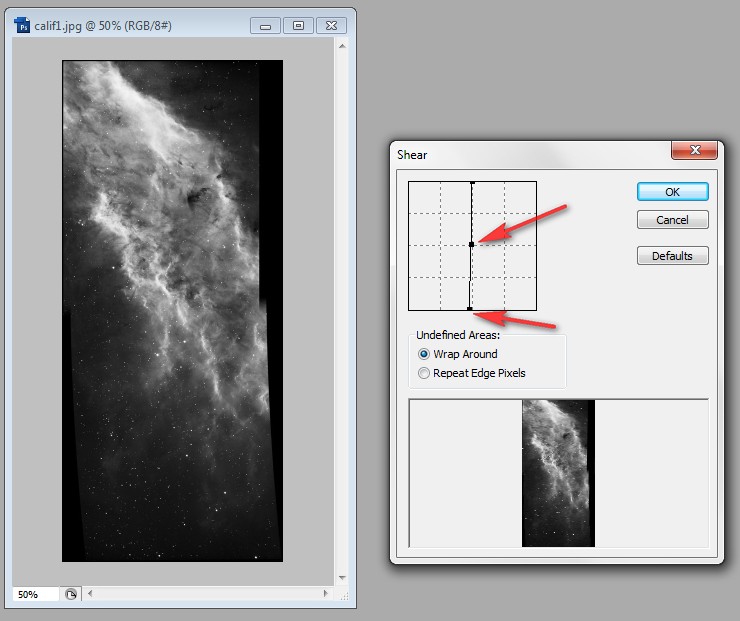
Step 3 - Follow Filter... Distort... Shear...
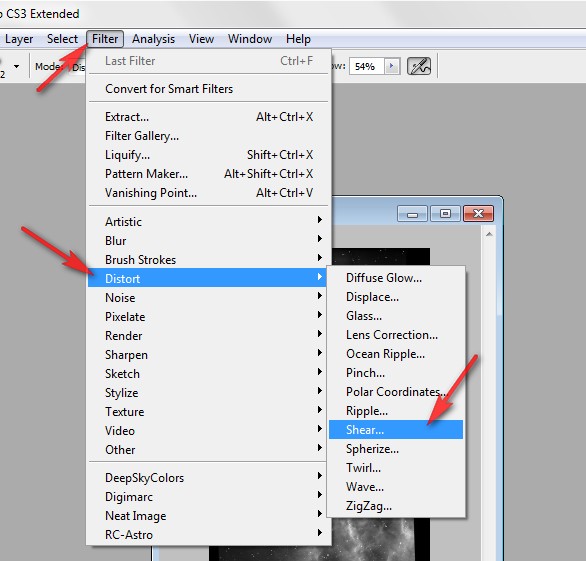
You do not want to distort the top half of the image so click on the centre of the shear line to lock it,
and then drag the lower end of the line a small distance to the left.
Note: a small distance - the action is rather fierce.
Click on OK and the job is done.
The end result after a small crop to tidy the edges: